
Learning how to make a website in India used to mean hiring expensive agencies or spending months mastering complex coding languages like HTML and CSS. Today, small business owners, freelancers, and creators can launch a high-performing site in under 30 minutes for less than the cost of a daily cup of tea.
Whether you want to launch a local consulting service, build a niche blog, or start an e-commerce store, learning how to make a website in India using self-hosted WordPress gives you total control over your digital brand.
This ultimate step-by-step tutorial breaks down every phase of the process—from picking a domain and choosing fast Indian server hosting to setting up instant UPI payment collection via Razorpay.
Step-by-Step Guide to Create a Website in India
Step 1: Choose the Best Website Platform
Before registering your web address, you must pick the core system that powers your content. While hosted platforms like Wix and Shopify exist, self-hosted WordPress (WordPress.org) remains the best option for building a website in India.
WordPress.org vs. Drag-and-Drop Builders
Metric | WordPress.org (Recommended) | Proprietary Builders (Wix / Shopify) |
|---|---|---|
Ideal For | Blogs, Local Services, E-commerce | Basic landing pages |
Average Monthly Cost | ~₹150 to ₹300 / month | ~₹800 to ₹2,500+ / month |
Ownership | 100% full content ownership | Platform lock-in |
Scalability | Unlimited via 60,000+ plugins | Restricted by pricing tier |
Over 43% of the web runs on WordPress. It requires zero coding skills, offers thousands of free layout themes, and lets you expand features as your enterprise grows.
Step 2: Register Your Custom Domain Name (.in vs .com)
Your domain name serves as your permanent home on the web (for instance, yourbusiness.in). Picking the right extension is crucial when planning how to make a website in India.
How to Select a Winning Domain:
- Target Audience: Select a .in extension if your primary target audience resides within India. Choose a .com extension if you plan to attract global traffic.
- Keep It Simple: Use 2 to 3 easy-to-spell words. Avoid numbers, hyphens, and double letters that create confusion.
- Brand Alignment: Choose a domain name that matches your registered business name or personal brand.
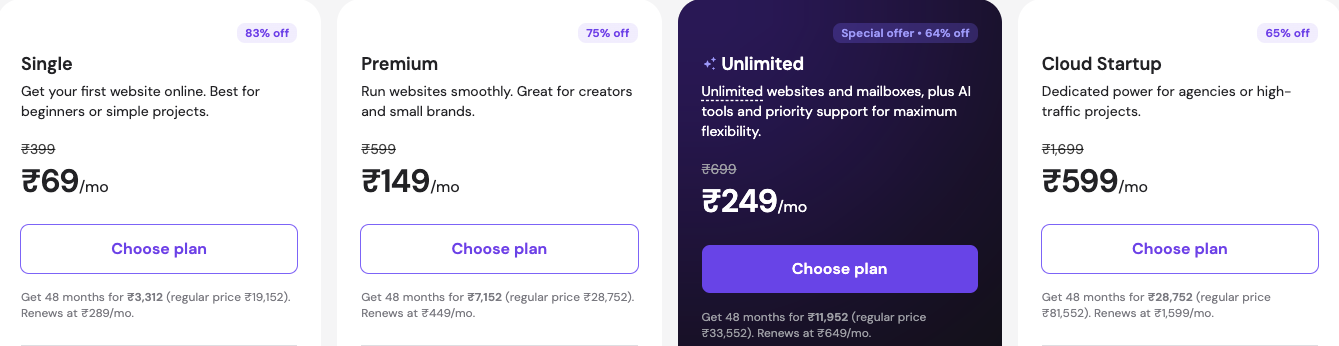
Pro Tip: Do not purchase a domain separately first. Most major hosting providers like Hostinger India bundle a free 1-year domain name when you buy their annual web hosting packages.
Step 3: Buy Fast Web Hosting with Indian Data Centres
Web hosting provides the digital space where your website files, images, and databases are stored. When optimising how to make a website in India, server physical location is a core ranking factor.
Why Server Proximity Matters for Speed and SEO
If your primary visitors reside in Mumbai, Delhi, or Bengaluru, hosting your files on a server located in the US creates unnecessary latency. Choosing web hosting with local Indian data centres (e.g., Mumbai or Bengaluru) like Hostinger ensures:
- Faster page load speeds on local 4G/5G mobile networks.
- Improved rank signals on local search results.
- Lower bounce rates from fast-loading pages.
Must-Have Hosting Requirements in India:
- INR Currency Support: Transparent billing in Indian Rupees (₹).
- Local Payment Gateway: Support for UPI (Google Pay, PhonePe, Paytm), Net Banking, and Indian debit cards.
- GST Invoicing: Ability to enter your GSTIN during checkout to claim Input Tax Credit.
- Free Security: Complimentary SSL certificate (HTTPS encryption) and automated daily/weekly backups.
Avail exclusive 80% off for a limited time. 100% satisfaction guarantee.
Step 4: Install WordPress and Enable SSL Encryption

Modern web hosts like Hostinger provide automated 1-click installer setups inside their dashboard panels, taking all the friction out of learning how to make a website in India.
Step-by-Step Installation Process:
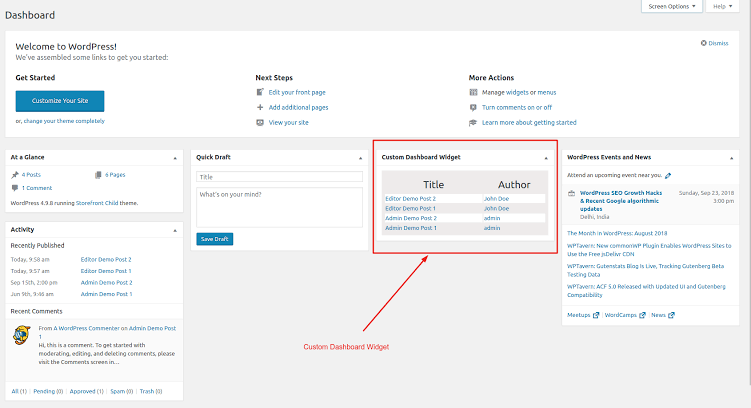
- Log into your web host control panel (e.g., Hostinger hPanel).
- Navigate to the Auto Installer tool and select WordPress.
- Create your secure admin login credentials (Admin Username, Strong Password, and Business Email).
- Select your preferred database language (English).
- Ensure the Free SSL Certificate checkbox is active to enforce HTTPS security.
- Click Install. Your site will be online in under 2 minutes.
To log in to your fresh website, navigate to yourdomain.in/wp-admin in your web browser and enter your administrative credentials.
Step 5: Design Your Site & Add UPI Payment Gateways
With WordPress installed, you can customise your site design and integrate essential Indian digital payments directly from your administration panel.
1. Select a Fast, Lightweight Theme
Navigate to Appearance → Themes → Add New. Avoid bloated, heavy themes that slow down mobile load times. Recommended options include:
- Astra: Highly customizable, mobile-friendly theme optimised for page speed and WooCommerce integrations.
- GeneratePress: Extremely lightweight code structure ideal for high-speed publishing and local service pages.
- OceanWP: Feature-rich layout design option built specifically for local e-commerce stores.
2. Install Essential WordPress Plugins
Plugins extend your site’s functionality. Navigate to Plugins → Add New and install:
- Rank Math SEO: Automatically optimises your on-page titles, descriptions, and structural Schema markup.
- LiteSpeed Cache / WP Optimize: Speeds up asset loading times on mobile network connections.
- Razorpay / Cashfree Payments: Enables instant UPI, QR code, Google Pay, PhonePe, and credit card checkouts.
Step 6: Publish Essential Legal Pages for Indian Compliance
To build consumer trust, fulfil Google E-E-A-T requirements, and ensure legal compliance under Indian regulations, add these dedicated pages before going public:
- About Us: Shares your enterprise mission, founder background, and verified physical address.
- Contact Us: Displays a working contact form, direct phone number, and support email address.
- Privacy Policy: Outlines user data collection practices, cookie tracking, and analytics usage.
- Terms & Conditions: Establishes usage rules, liability limits, and dispute resolution guidelines.
Cost Breakdown: How Much Does a Website Cost in India?
A common question when figuring out how to make a website in India is the total upfront setup budget. Here is a baseline breakdown for a self-hosted WordPress site using Hostinger:
Component | Provider / Tool | Cost (First Year) |
|---|---|---|
Domain Name | Included Free with Hostinger Annual Plan | ₹0 (Normally ₹800/yr) |
Web Hosting | Shared Hosting with Indian Data Center | ₹1,800 – ₹3,200 |
CMS Platform | WordPress.org | ₹0 (100% Free Open Source) |
SSL Certificate | Let’s Encrypt (Bundled) | ₹0 (Free) |
Design Theme | Astra / GeneratePress (Free Tier) | ₹0 |
Payment Gateway | Razorpay / Cashfree | ₹0 Setup Fee (2% per transaction) |
Total Starting Cost | Complete Beginner Setup | ₹1,800 to ₹3,200 / year |
Frequently Asked Questions (FAQs)
How to make a website in India for free?
You can create a free website using platforms like WordPress.com or Blogger. However, these free services do not allow custom .in domains, display third-party advertisements, and severely restrict your customisation options. Investing a nominal amount (~₹150/month) in self-hosted WordPress via Hostinger gives you full site ownership and a professional brand presence.
Can I accept UPI payments on a WordPress website?
Yes. You can accept instant UPI payments by integrating an Indian payment gateway plugin like Razorpay, Cashfree, or InstaMojo into your WordPress site. Once your merchant KYC is verified, visitors can pay using Google Pay, PhonePe, Paytm, or BHIM.

Rupak Chakrabarty is the Founder and Lead Business Coach at MUVSI. With over two decades of experience in entrepreneurship, marketing, and business consulting, he helps aspiring entrepreneurs and MSMEs build profitable, market-driven businesses. His expertise includes business planning, B2B marketing, customer acquisition, and digital growth strategies.